
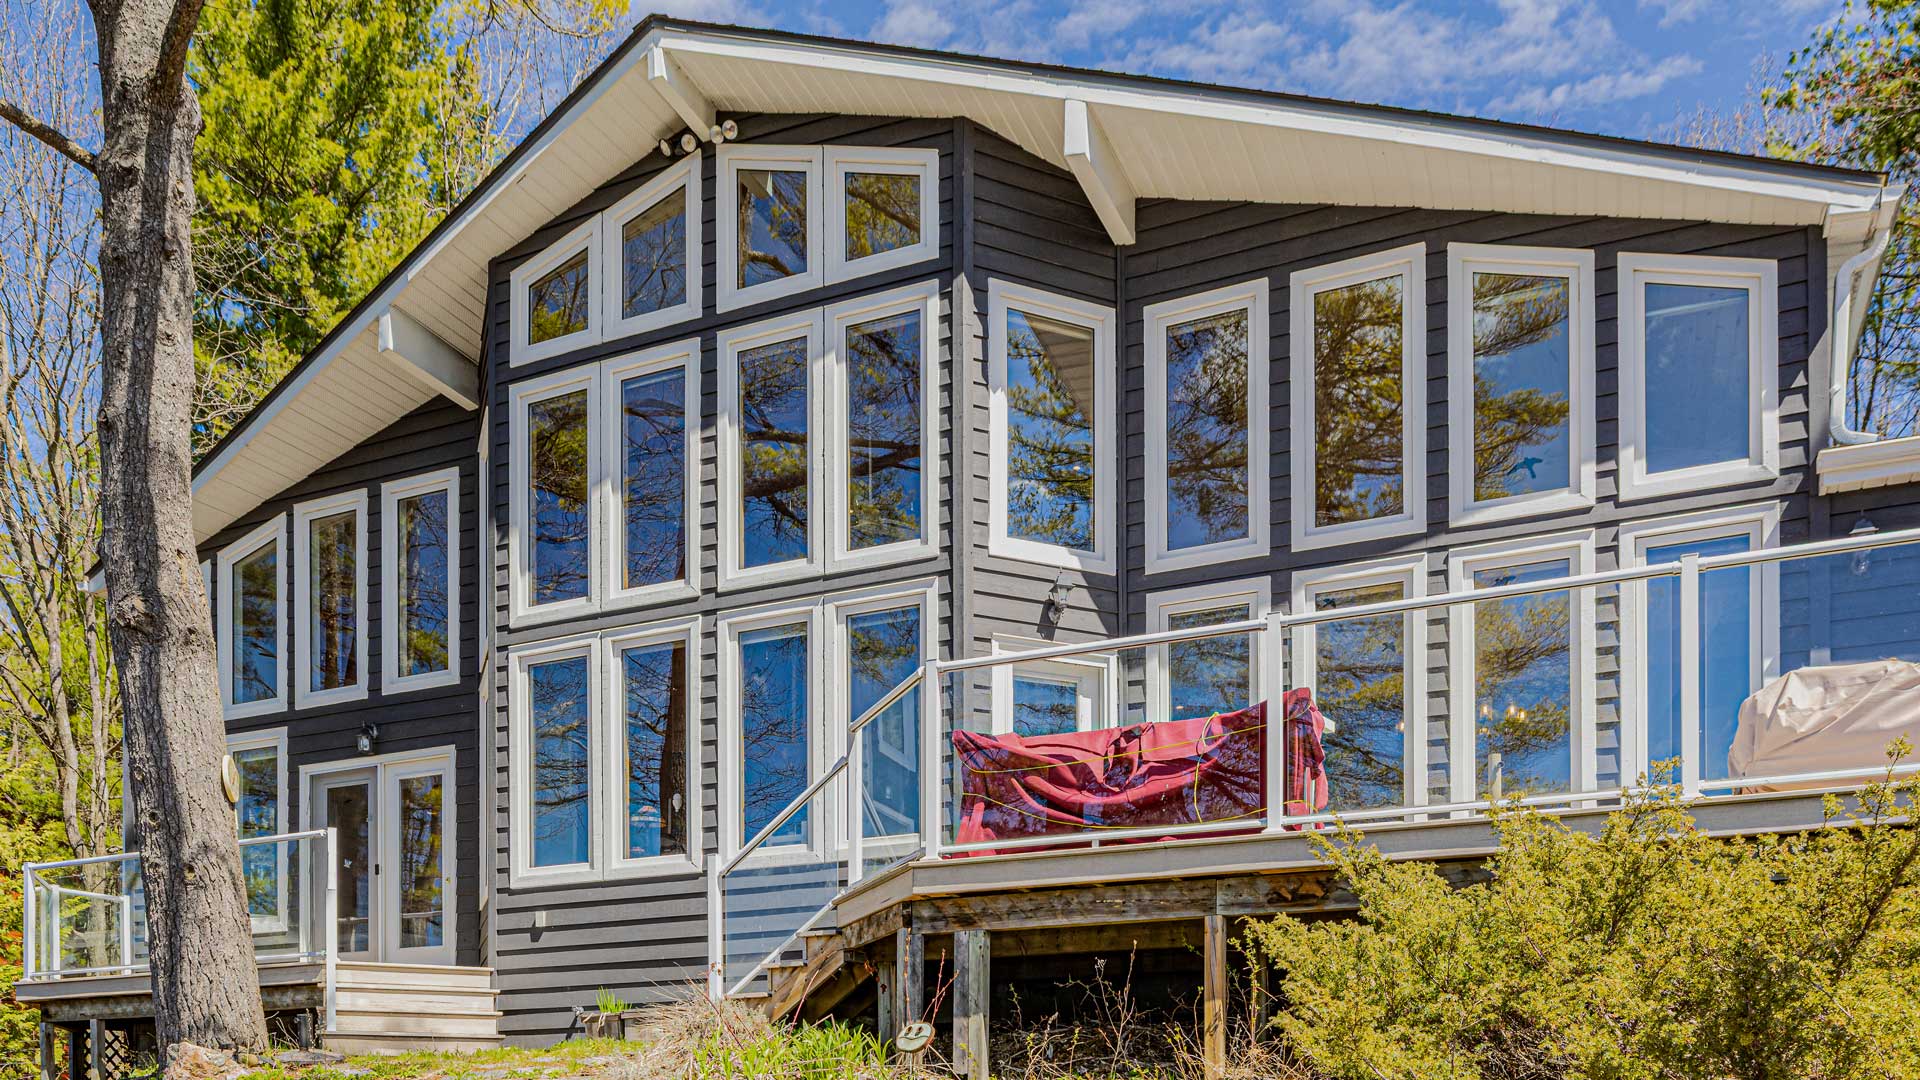
How Years of Ice Damming Nearly Destroyed a Gravenhurst Cottage From the Inside Out
He'd been noticing the stains for two years before he called.
Small ones at first - faint watermarks on the pine wall panels in the back bedroom that could have been anything. A patch of hardwood near the window that lost its sheen one spring and never got it back. The kind of thing you chalk up to an aging cottage and move on.
By the third winter, it wasn't subtle anymore. The pine cladding in several rooms had visible water damage spreading across it. The hardwood floors were discolouring in patches - the finish breaking down in places that didn't line up with any spill or leak he could find. And the window frames had started to swell, the wood puffing outward just enough that the sashes stuck when he tried to open them.
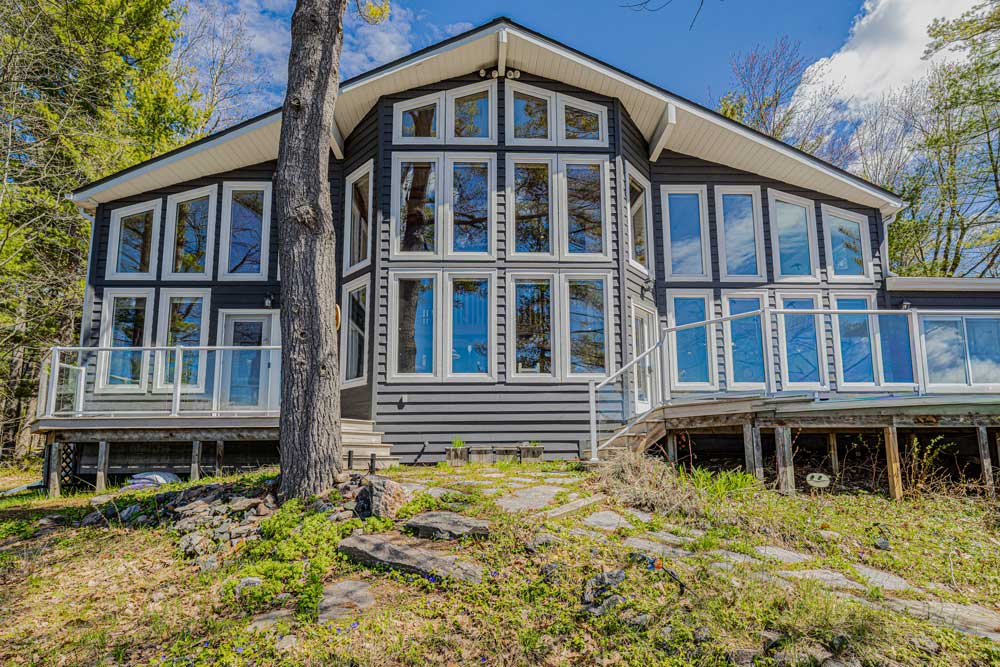
His cottage on Loon Lake Road in Gravenhurst - the place his family had been coming back to for years - was deteriorating from the inside, and he couldn't figure out why.
The answer was above his ceiling. A roof assembly that had been bleeding heat for years was driving a cycle of snowmelt, ice formation, and water intrusion that most cottage owners don't hear about until it's already done serious damage.
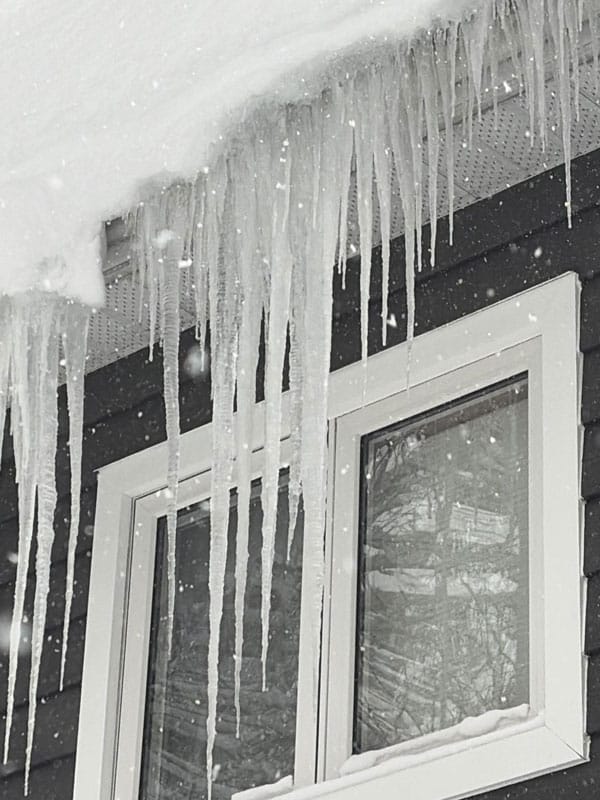
It's called ice damming. And by the time you can see it on your walls, it's been happening for a while.
The Quiet Problem Behind Every Ice Dam: Your Roof Is Too Warm
If you own a cottage in Muskoka - or anywhere in Ontario's snow belt - this is worth understanding, because ice damming is one of the most common and most preventable sources of serious structural damage to seasonal and year-round homes. And most people don't know it's happening until they're staring at the evidence.
Here's the cycle:
Your ceiling is leaking heat you can't feel. If the insulation between your living space and your attic is thin, old, or poorly sealed - or if you have cathedral ceilings with no effective air barrier - warm air migrates upward into the roof assembly all winter long. Your heating bill absorbs the cost. You never notice.
That heat warms your roof from the inside. The upper portion of the roof - above the heated rooms below - gets warm enough to melt snow, even when it's well below freezing outside. But the eaves and overhangs, which extend past the building, stay cold. You now have a warm roof above and a cold edge below.
Meltwater runs down and hits a wall of ice. Snow melts at the warm peak, trickles downhill under the snowpack, and refreezes the moment it reaches the cold eaves. Day after day, that ice builds into a solid ridge - a dam - that blocks all drainage.
Trapped water goes the only direction it can: into your cottage. With the ice dam blocking the gutters, meltwater pools on the roof surface and finds every nail hole, seam, and gap in the roofing membrane. It pushes under the shingles, through the roof deck, past the vapour barrier, and into the insulation, framing, wall cavities, and floors below.
Here's the part most people miss: the damage doesn't show up where the water enters. Water that penetrates the roof above your kitchen can travel through the ceiling cavity, run along a wire or a pipe, and emerge as a stain on a bedroom wall twenty feet away. The stain on your pine panelling may have nothing to do with the wall it's on. Without opening things up, you'd never trace it back.
One winter of this leaves marks. Two or three winters of it can rot framing members, destroy insulation, saturate entire wall cavities, and compromise the structural integrity of materials you can't see without pulling the finishes off.
That's what had been happening at this Loon Lake cottage. Quietly. For years.
What Was Really Going on Inside This Cottage
When the homeowner called, he thought he had a wall problem. What he actually had was a roof problem that had been expressing itself through every surface in his home for three winters.
Our assessment started in the attic and worked down. Here's what it uncovered:
The Attic: Where It All Started
The insulation was insufficient - well below the thermal resistance needed to keep heat from escaping through the ceiling. The ventilation was inadequate. Every day that the cottage was heated, warm air rose through the ceiling assembly, hit the underside of the roof deck, and turned the roof surface above into a snowmelt machine. This was the engine driving the entire ice dam cycle, and it had been running unchecked for years.
The Pine Walls: Damage You Could See - and Damage You Couldn't
The original tongue-and-groove pine cladding - the kind of interior finish that gives a Muskoka cottage its warmth and character - had absorbed enough moisture over multiple winters that the damage went well beyond what a sanding pass could fix. In some rooms, the staining had penetrated deep into the wood grain. In others, boards had begun to swell. Some needed to come out entirely.
If you've ever walked into your cottage after a long winter and noticed a stain that wasn't there in the fall, this is often what's behind it. It's not condensation. It's not a roof leak in the conventional sense. It's water that entered the building above and travelled through the cavities until it found a place to show itself.
The Floors: Water From Above, Damage From Below
The hardwood flooring in several rooms had lost its colour and finish - discolouring from underneath in a pattern that didn't match any surface spill. Water from the wall cavities above had been migrating downward and emerging at floor level, breaking down the finish coat from below.
In a cottage that sees bare feet in July and wet boots in October, the floor finish is doing real work. Once it's compromised, the wood underneath is exposed to every bit of moisture the house can throw at it - and in Muskoka, that's a lot.
The Window Frames: The Canary in the Wall
Window frames don't swell overnight. By the time the swelling is visible - frames sticking, sashes hard to open, wood visibly puffed - the moisture has been present long enough to saturate not just the frame, but the wall assembly behind it. The insulation may be wet. The vapour barrier may be breached. The framing lumber may be absorbing water.
A swollen window frame isn't a window problem. It's a wall problem with a window-shaped warning sign.
Why Most Ice Dam Repairs Fail (and What We Did Instead)
Here's what usually happens:
A cottage owner notices water stains or swollen window frames. They call a contractor. The contractor patches the drywall, refinishes the floor, replaces the trim, sends the bill, and leaves. The cottage looks great. Everyone's happy.
Then November comes. Snow piles on the same roof. Heat escapes through the same ceiling. The same ice dams form at the same eaves. The same water finds the same path into the same walls. By spring, the stains are back - sometimes in the same spots, sometimes in new ones.
The cottage owner calls another contractor. The cycle repeats.
The reason this keeps happening is that the damage most people call about is a symptom, not the disease. Stained pine, damaged floors, swollen frames - those are where the water ended up. The problem is where the water came from: a roof assembly that lets heat escape, a ceiling that can't hold warm air where it belongs, and a ventilation system that doesn't keep the roof surface cold.
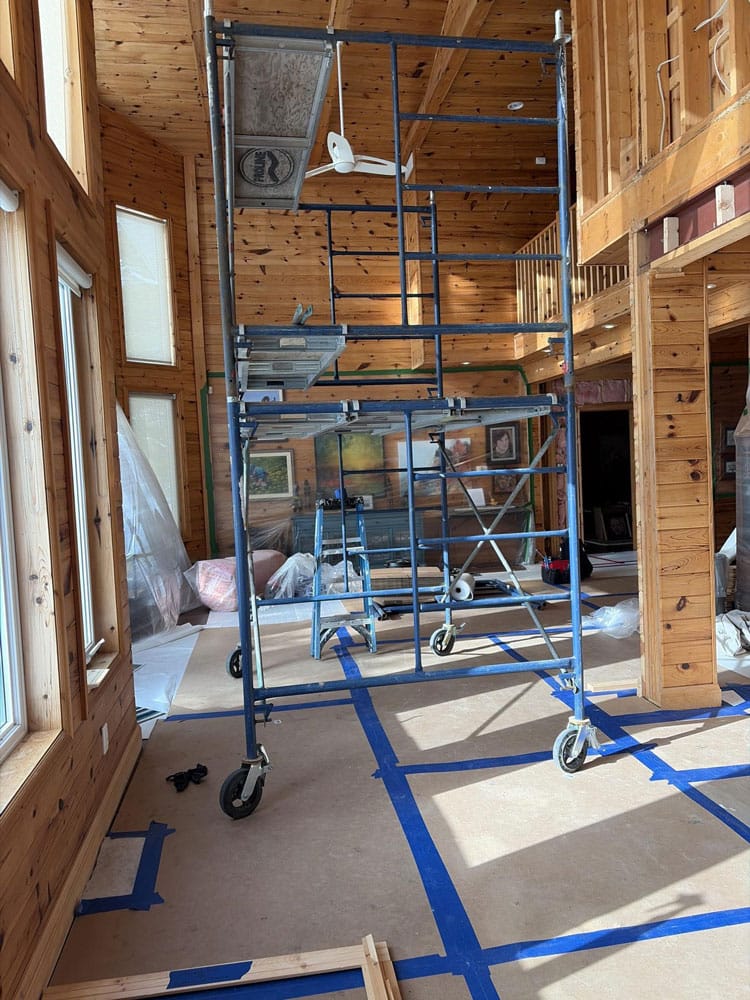
At this Loon Lake cottage, we wouldn't touch the interior until the roof assembly was permanently fixed. The pine can wait. The floors can wait. The window frames can wait. None of that work means anything if the water is coming back next November.
Attic Insulation to R-60: Above Code, for a Reason
Ontario Building Code calls for a minimum of R-50 in attic spaces. That's the legal floor - the minimum thermal resistance a builder can install and still pass inspection.
For a cottage that has already proven it's vulnerable to ice damming - one that sits under Muskoka's heavy snowpack from November through April, heated all winter, with years of documented water damage from heat escaping through the ceiling - code minimum isn't enough.
We re-insulated this attic to R-60.
R-value measures thermal resistance: how effectively the insulation slows heat from passing through the ceiling into the roof cavity above. At R-60, the temperature differential between the heated living space and the roof surface drops to the point where the snow on the roof stays frozen. No melting at the peak. No meltwater running to the eaves. No ice dam forming at the cold edge. The cycle that had been damaging this cottage for years breaks completely.
The jump from R-50 to R-60 doesn't sound dramatic. In a building that's already shown what happens when heat gets through, it's the difference between "this should be fine" and "this is solved."
Cathedral Ceilings: The Problem Batt Insulation Can't Fix
If your cottage has cathedral ceilings - where the interior finish follows the slope of the roof - you have one of the most common weak points in cottage construction.
In a standard attic, there's room to pile insulation to whatever depth the R-value demands. In a cathedral ceiling, the insulation cavity is the rafter depth itself - typically six to eight inches. There's no room to add more. And batt insulation, even when it fills that space, can't seal the air gaps between the batts and the wood framing that let warm air bypass the insulation entirely.
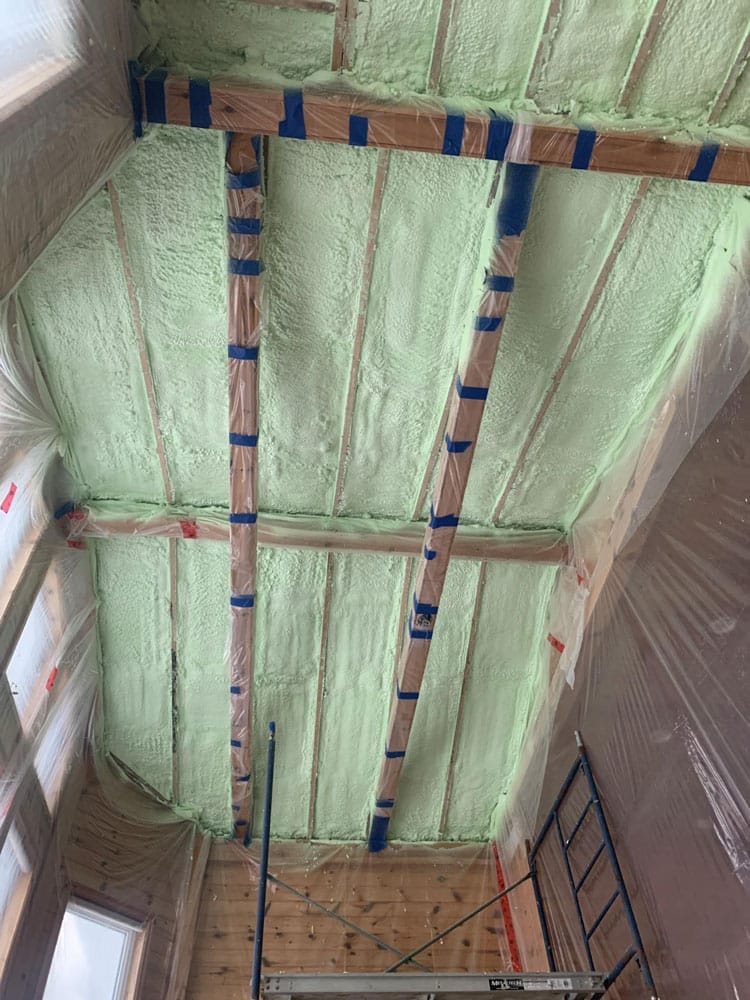
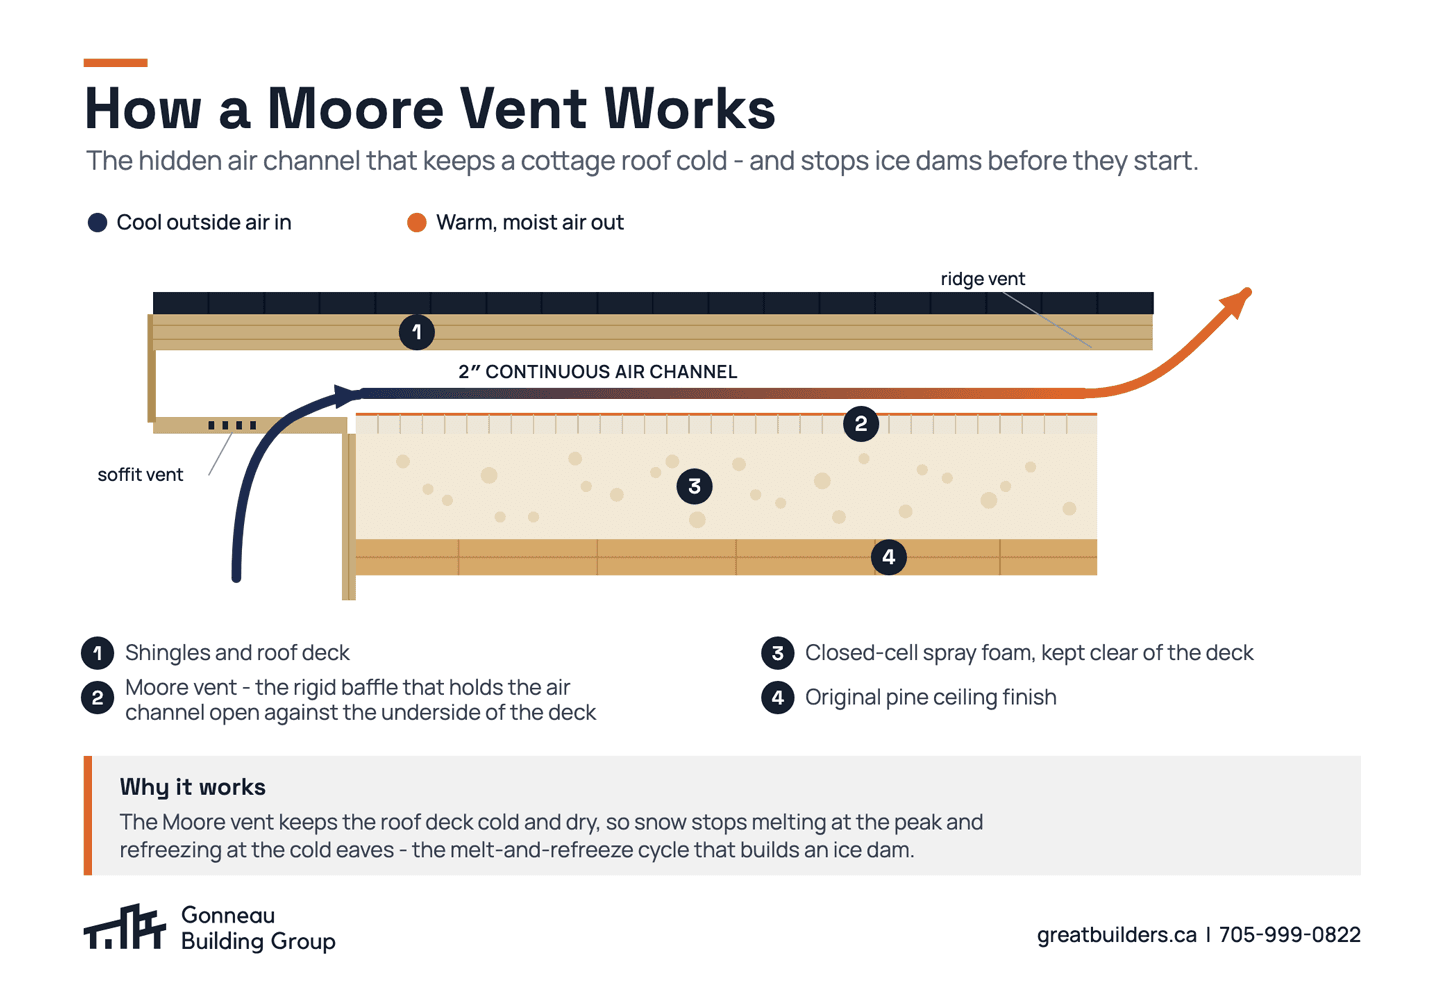
For the cathedral sections of this cottage, we applied closed-cell spray foam insulation. Spray foam expands to fill the rafter cavity and bond to the framing - but it's deliberately held clear of the roof plywood, leaving a continuous two-inch airflow channel from soffit to ridge so the roof deck stays cold and can dry. It eliminates air gaps completely. It delivers a higher R-value per inch than batt. And it works simultaneously as insulation, air barrier, and vapour retarder - three jobs that would otherwise require three separate materials, three separate installations, and three separate opportunities for failure.
If your cottage has cathedral ceilings and has ever had an ice dam, there's a good chance this is why.
Engineered Ventilation: Designed, Not Guessed
Insulation keeps heat in the living space. But a roof assembly also needs cold air circulating beneath the deck to carry away residual heat and moisture. Without ventilation, even a well-insulated roof cavity can develop warm patches, condensation, and the localized temperature imbalances that restart the melt-refreeze cycle.
We installed Moore vents - an engineered ventilation product - backed by stamped engineering drawings. That means the ventilation design for this roof was calculated and approved by a licensed professional engineer for this specific roof geometry, this climate zone, and this insulation strategy. Not a rule-of-thumb estimate. Not "we added some soffit vents and a ridge vent." A system.
Insulation and ventilation are a pair. The insulation stops heat from reaching the roof deck. The ventilation keeps the underside of the deck uniformly cold - no warm spots, no localized melting, no dams. One without the other is a half-measure. Half-measures don't survive Muskoka winters.
Bringing the Cottage Back: Pine, Floors, Frames
With the roof assembly permanently corrected - the heat sealed in, the ventilation engineered, the conditions that caused the ice damming eliminated for good - we turned to the damage it had caused.
This is the part the homeowner had been waiting for. The part where his cottage starts looking like his cottage again.
You Can't Fake Pine
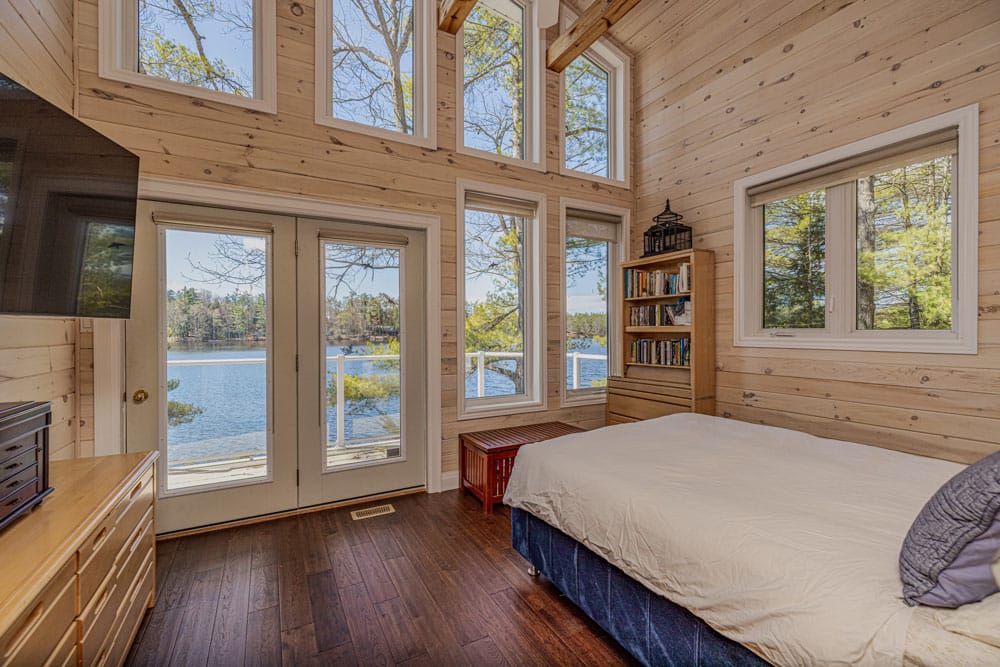
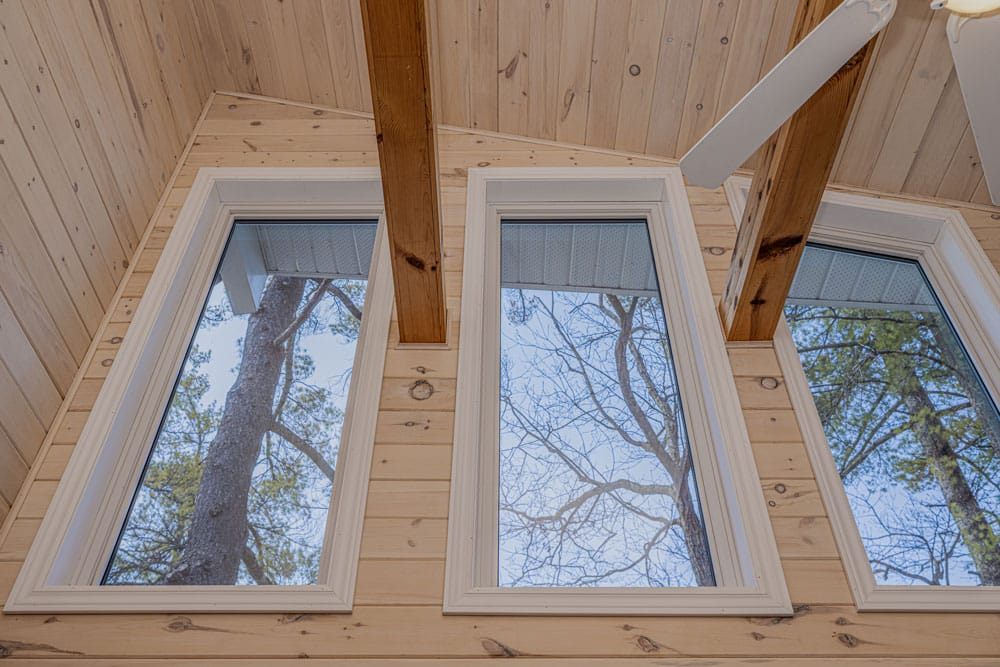
The original tongue-and-groove wall cladding in this cottage had aged into a colour and grain pattern that was specific to the wood, the light, and the years it had been on those walls. It's the kind of finish that makes a Muskoka cottage feel like a Muskoka cottage - warm, textured, real.
Pulling out the damaged boards and replacing them with new pine off a lumber rack would have been faster. It also would have left every repair visible. New wood next to old. A patchwork of colour and character announcing itself every time you walked into the room. That's not restoration - it's a Band-Aid with a price tag.
We sourced replacement material that matched the existing cladding in grain pattern, colour tone, and board profile. The repaired sections sit flush and continuous with the original pine, so the finished wall reads as one surface. Not a wall that was damaged and fixed. A wall that looks like it always did.
It takes longer. It costs more. In a cottage where the interior finish IS the character of the building, it's the only approach worth doing.
Every Floor Got What It Needed
Hardwood floor restoration after years of water damage isn't a one-pass job. Each room in this cottage had been affected differently - different amounts of exposure, different durations, different depths of damage. A floor that absorbed moisture from a leaking wall cavity over three winters is in a fundamentally different condition than one that caught runoff for a single season.
We assessed and restored each room individually - sanding depths, stain matching, and finish coats tailored to the specific condition of each floor. The result looks consistent and whole because each room got exactly what it needed, not what was fastest to do at scale.
If you're a cottage owner reading this and your floors have patches where the colour or sheen doesn't match the rest of the room - and you can't trace it to a spill - look up. The answer might be above your ceiling.
What's Behind the Window Frame Matters More Than the Frame Itself
Repairing a swollen window frame is straightforward carpentry. The hard part is what you do behind it.
By the time a wood frame has swollen visibly, moisture has had time to migrate into the surrounding wall assembly. The insulation behind the frame may be soaked. The vapour barrier may be torn or separated. The framing lumber may be absorbing water. If you repair the frame and close the wall up without addressing all of that, you're sealing trapped moisture inside the cavity. Within a few years, that moisture becomes mould. The mould becomes rot. And the repair fails from behind.
We repaired the affected window frames and dried, inspected, and sealed every surrounding wall cavity before the finish went back on. No trapped moisture. No hidden mould risk. No callbacks in two years.
Smoke Detection: Brought Up to Code
Whenever a restoration project opens walls and ceilings, it's a responsibility to bring the home's safety systems up to current standards. We updated the smoke detection system throughout the cottage to current Ontario Building Code requirements.
It's not the part of the project anyone photographs. It's the part that matters at 3 a.m.
A Cottage That Came Back Stronger
The cottage on Loon Lake Road didn't just get repaired. It got upgraded.
The roof assembly now performs above Ontario Building Code minimums. R-60 insulation in the attic. Closed-cell spray foam in the cathedral ceiling sections. Engineered ventilation designed, calculated, and stamped for this specific structure. The conditions that drove ice dam formation for years have been permanently eliminated - not patched, not mitigated, eliminated.
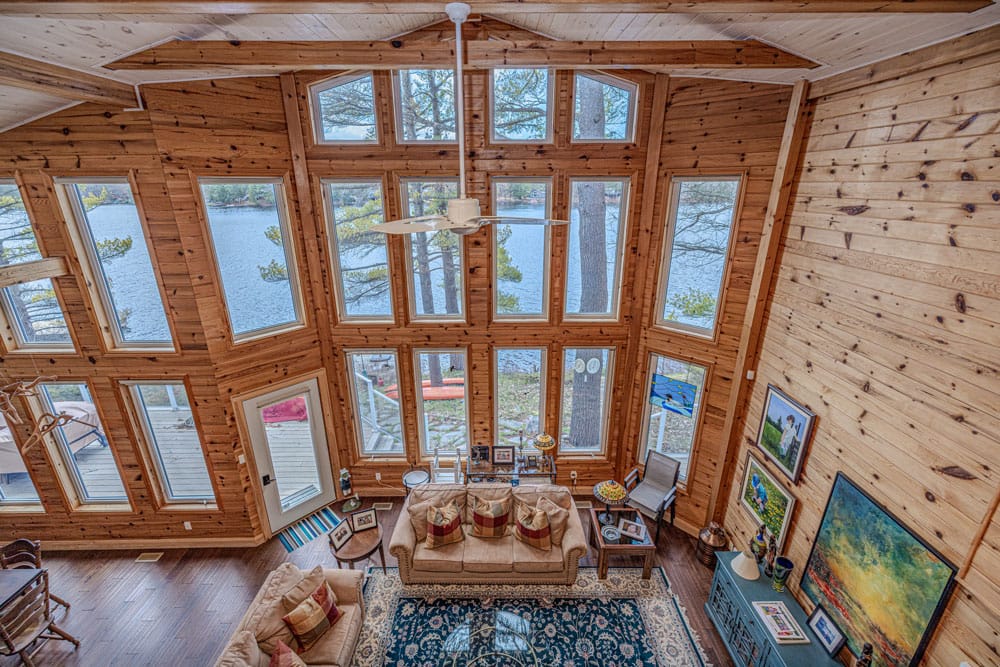
The interior - the pine walls that give the cottage its character, the hardwood floors that have felt decades of bare feet and winter boots, the window frames that let in the light off Loon Lake - has been restored with materials matched to the originals and techniques that respect what this place is. A family cottage. Not a spec house. Not a flip.
And behind the finishes - in the wall cavities and ceiling assemblies and attic spaces that no one will ever see again - everything has been dried, inspected, and sealed properly. The invisible work is where restoration projects succeed or fail five years after the contractor leaves. We know that. We build accordingly.
The homeowner's response was the strongest endorsement we could have asked for. After the Loon Lake restoration was complete, he engaged Gonneau Building Group for work on a family member's cottage across the lake and on his own property in the city.
When someone trusts you with three homes, it's not because of the estimate. It's because of the work.
Does Any of This Sound Like Your Cottage?
Ice damming doesn't announce itself with a dramatic leak. It builds quietly over several winters until the damage is too advanced to shrug off. Here's what to watch for:
Thick ice ridges running along your eaves every winter. A few icicles are normal. A continuous wall of ice spanning the full eave line is not - it means meltwater is pooling and refreezing, and the dam is already growing.
Stains on interior walls or ceilings that you can't trace to a source. Especially near exterior walls or where the ceiling meets the roof. These stains may be far from where the water actually entered - ice dam water travels through ceiling cavities and wall channels before it shows up where you can see it.
Hardwood floors losing their colour or finish in patches that don't match any spill. Water migrating down through wall cavities can emerge at floor level and damage hardwood from underneath - where you'd never think to look.
Window or door frames that feel tight, stick, or look slightly swollen. This isn't just humidity. It's prolonged moisture exposure inside the surrounding wall assembly.
A musty or damp smell in rooms with no obvious water source. Hidden moisture behind finishes can go undetected for years before it announces itself by smell - or by mould.
Insulation that hasn't been assessed in 15+ years. The R-value that was considered adequate when your cottage was built may be well below today's standards - and well below what's needed to prevent heat loss through your roof.
If you're reading this list and checking boxes, the time to address it is now - before snow lands on your roof this November. A roof assembly assessment in the summer or early fall takes a few hours. Discovering the damage after another winter of ice damming takes months to repair.
Not ready for a call? Download our Ice Damming Risk Scorecard- a free self-assessment that walks every Muskoka cottage and waterfront property owner through the roof, insulation, and drainage red flags that lead to ice dams, so you can see how much risk your place is carrying before the snow flies.
Frequently Asked Questions About Ice Dam Damage
Gonneau Building Group is a fifth-generation custom home and cottage builder serving Muskoka and Simcoe County. Led by Eric Gonneau, P.Eng., MBA, the firm brings over 150 years of family building knowledge to every project. Members of the Muskoka Builders' Association, Professional Engineers Ontario, and Passive Buildings Canada.
Book a free consultation -> | 705-999-0822 | info@greatbuilders.ca